← Back to overview
IDE Gateway Plugin · Setup

The PyCharm IDEAgent Plugin

The plugin is the face of the whole system — a native PyCharm / IntelliJ tool window that turns your IDE into an agentic coding surface. It runs no model itself: it connects to your own Gateway, streams the agent's work back into the editor, and keeps you in control. This page walks through how to set it up from its Settings panels.

New here? Follow the 5-minute quick setup →

Available on the JetBrains Marketplace — install directly into PyCharm / IntelliJ.

IDEAgent RAG File Watcher

What it does in your IDE

IDEAgent installs as a tool window with four tabs — running entirely against infrastructure you own:

  • Chat — project-aware conversation with the agent, streamed live into the tool window.
  • Threads — every conversation is a persistent thread you can switch between and resume.
  • Tasks — the agent's planned steps for a request, so you see what it intends to do before it does it.
  • Edits — the file changes the agent proposes or applies, surfaced inside the IDE.

Each thread carries an Auto switch that controls human-in-the-loop (HITL): Auto off means HITL is enabled, so the agent pauses for your approval before consequential actions; Auto on means HITL is disabled, so it proceeds without pausing for individual approvals. You decide per thread whether consequential actions require approval.

A small set of high-risk shell commands is always gated, though: git, sudo and docker commands still pause for your approval even when Auto is on. This safeguard can't be turned off from the Auto switch — those commands are simply too consequential to run unattended.

Open the settings

Everything below lives under the plugin's Settings panel — no files to edit. Each section maps to one screen you fill in once.
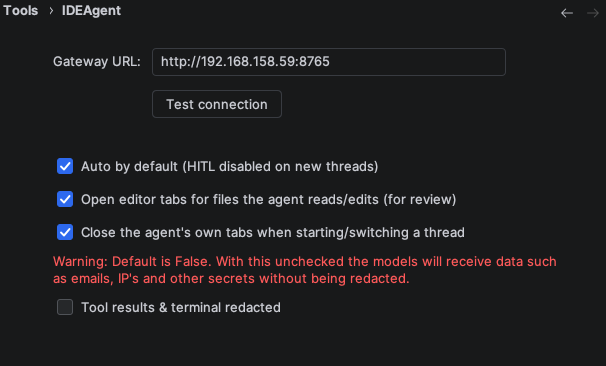
IDEAgent plugin main settings panel
Main settings. Point the plugin at your Gateway and set the defaults for new threads (starting Auto mode, editor behaviour). Use Test connection to confirm the Gateway is reachable before you start.
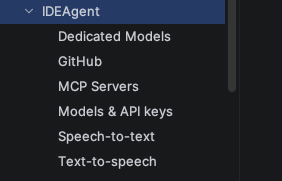
IDEAgent plugin settings overview with all sub-pages
All settings at a glance. The sub-pages — MCP Servers, Models & API keys, Dedicated models, RAG, Speech-to-text and Text-to-speech — are reached from here. Set them up in the order below.

MCP Servers

MCP servers are the tools the agent may call through the Gateway — the context engine, RAG search and project memory. Add your local server, toggle it on, and refresh to confirm it is reachable.
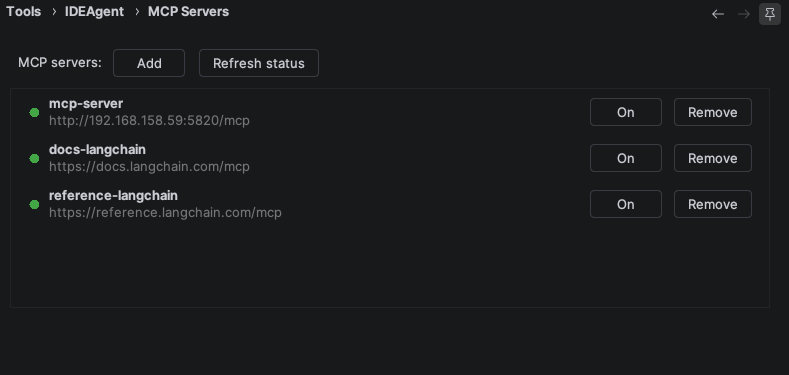
MCP Servers settings page
MCP Servers. Add each server, enable it, and use the refresh/status control to verify the connection. Disabled servers are simply not offered to the agent.

Models & API keys

IDEAgent works with the provider you choose — OpenAI, Anthropic, Google or a fully local Ollama endpoint. The Models & API keys settings page is where you enter the key for each cloud provider you want to use and point the plugin at your Ollama server. Your keys are stored in your machine's OS keychain (via IntelliJ's PasswordSafe) — never in plaintext config and never baked into the plugin — and are forwarded to the Gateway per thread. The gateway receives the selected key transiently for that request, does not persist it, and only sends credentials onward to the provider you selected. Leave the cloud keys blank and set only the Ollama base URL to run completely offline.
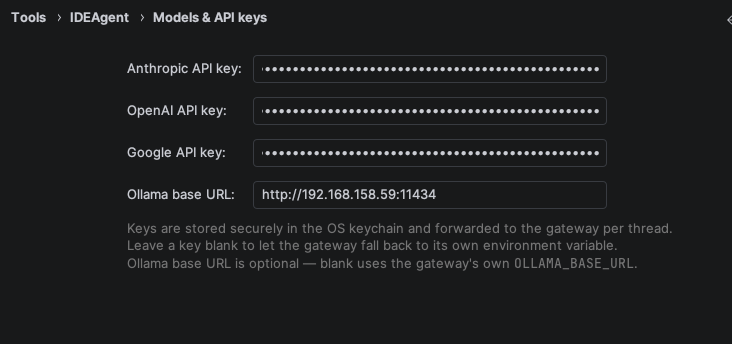
Models & API keys settings — Anthropic, OpenAI and Google API key fields plus the Ollama base URL
Models & API keys. Enter your Anthropic, OpenAI and Google API keys (each stored securely in the OS keychain) and set the Ollama base URL. Any provider you supply a key for appears in the model picker; the Ollama URL is optional and, left blank, falls back to the gateway's own OLLAMA_BASE_URL.

Dedicated models

Beyond the main coding model, a couple of small helper models keep the experience smooth — auto-generating thread titles and powering RAG retrieval. A compact model (local via Ollama, or one of your configured providers) is enough for both.
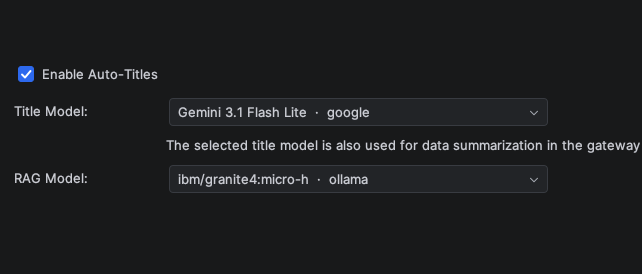
Dedicated models settings — auto-titles and RAG model
Dedicated models. Enable auto-titles and pick a small model for it, and choose the model used for RAG. A compact local model (served by Ollama) is enough for both.

RAG & the file watcher

The RAG file watcher lives inside the plugin. It keeps your project index in sync with the RAG server so the agent always retrieves the current state of your code. Connect it to your machines, then let it index.
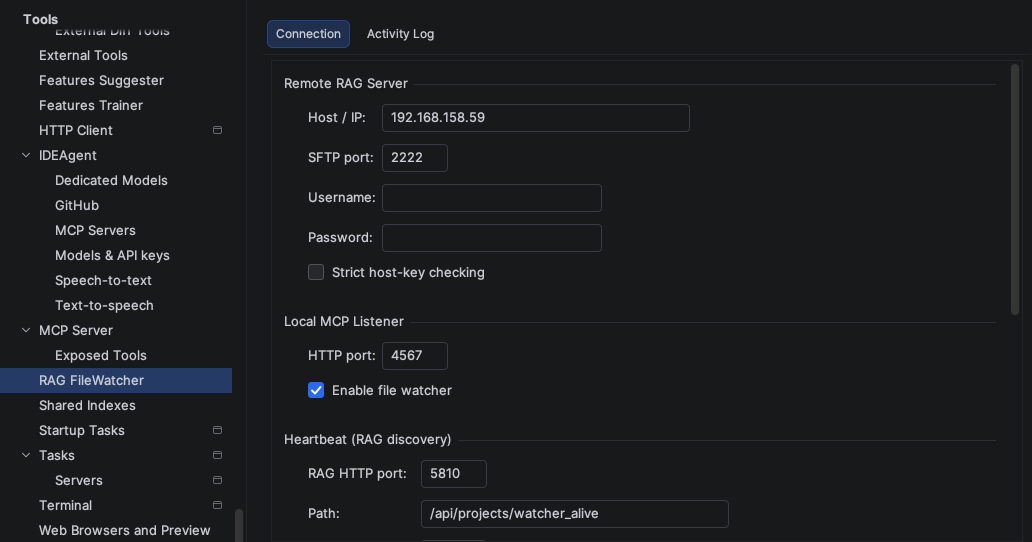
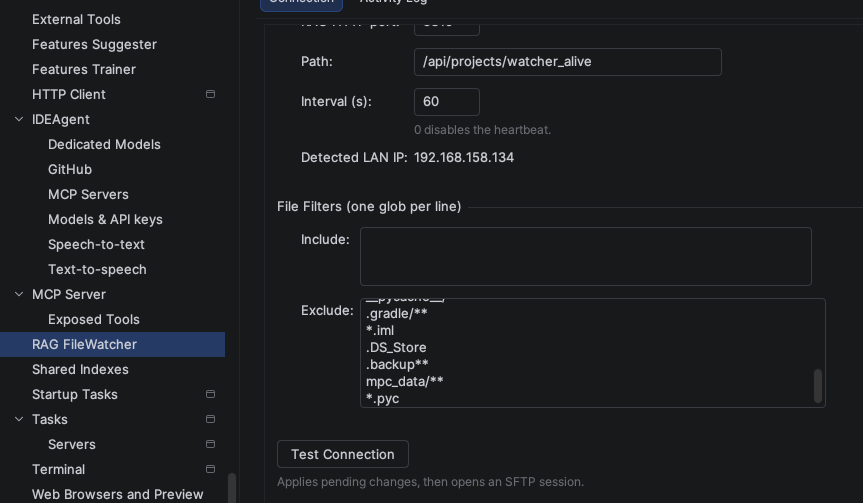
RAG file watcher settings — connection
Connection. Point the watcher at your RAG server and confirm it links to the machine(s) you want indexed.
RAG file watcher settings — indexing and status
Indexing & status. Watch the index build and stay current as you edit. Indexing quality is highest on CUDA GPUs; it still works on shared-memory GPUs (Dell / Mac), just with reduced quality.

Speech-to-text (Whisper)

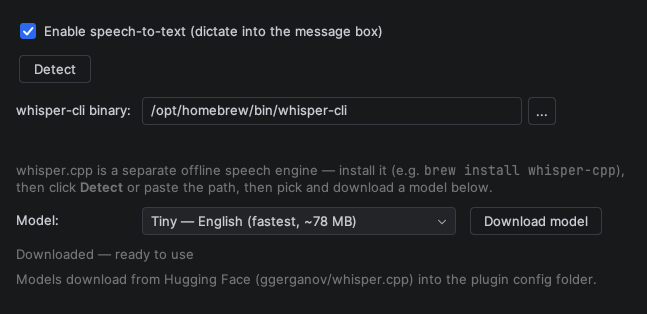
Voice input is optional and fully local. It uses Whisper, which must be installed on the machine running the plugin — the plugin then detects the binary.

  1. Install Whisper on this machine (for example brew install whisper-cpp).
  2. Open the Speech-to-text settings and enable it.
  3. Use Detect to locate the installed binary, then select a model to download.
Speech-to-text (Whisper) settings
Speech-to-text. Once detected and a model is downloaded, you can dictate to the agent. The audio never leaves your machine.

Text-to-speech (Piper)

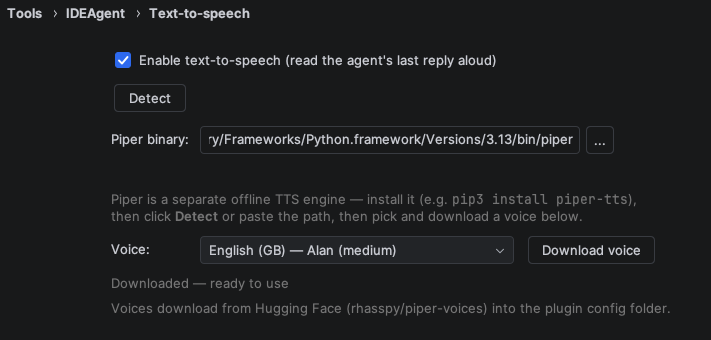
Voice output uses Piper, also installed locally and detected by the plugin.

  1. Install Piper on this machine (for example pip3 install piper-tts).
  2. Open the Text-to-speech settings and enable it.
  3. Use Detect to locate the binary, then download a voice.
Text-to-speech (Piper) settings
Text-to-speech. With a voice downloaded, the agent can read its replies aloud — no cloud speech service involved.

Privacy — telemetry & redaction

The plugin sends no product-usage telemetry back to us — no analytics, no usage tracking, no phone-home — and neither does the rest of the stack (gateway, MCP server, RAG server). It talks only to the gateway you configure, default localhost.

Optional redaction of tool and terminal output. When enabled, detected secrets — IP addresses, emails, API keys and tokens — are replaced with placeholders in tool and terminal results before that output is sent onward to the model. It filters what that output contains; it does not cover text you type or paste into the chat yourself. Going local is the point: with Ollama nothing leaves your infrastructure at all.

See the full architecture →